
In the intricate choreography of human movement, we often neglect the silent architecture holding us upright until the moment it falters. Most of us navigate the world on autopilot, oblivious to the sensory feedback loops—proprioception, vestibular input, and visual cues—that prevent a simple stroll from becoming a catastrophic tumble.
However, as sedentary habits and chronological aging begin to erode our neuromuscular acuity, that once-effortless grace can dissolve into a series of tentative, guarded steps. Improving your equilibrium is not merely about preventing falls; it is about reclaiming a sense of physical sovereignty and kinetic poise.
By integrating specific, scientifically-backed Balance Drills into your daily regimen, you can effectively recalibrate your body’s internal GPS. This isn’t just basic exercise; it is an essential sharpening of your “sixth sense,” ensuring that every joint and muscle fiber communicates with surgical precision.
Whether you are an elite athlete seeking an explosive edge or someone simply wishing to traverse uneven terrain with unwavering confidence, mastering these stability protocols is transformative. Prepare to dive into a curated selection of 7 powerful moves designed to fortify your structural integrity and transform your relationship with gravity, turning every wobbly moment into an opportunity for unshakable strength.
In the grand tapestry of human movement, stability is the silent thread that holds every gesture together. While we often obsess over muscle mass or cardiovascular endurance, we frequently overlook the “Invisible Foundation”—the sophisticated interplay between your brain, nervous system, and musculoskeletal frame that keeps you upright against the relentless pull of gravity.
The Invisible Foundation of Every Step You Take
Every time you navigate a crowded sidewalk or step off a curb, your body performs a miracle of micro-adjustments. This foundation relies on proprioception, your body’s innate ability to sense its position in space without looking. Your joints and muscles are embedded with millions of tiny sensors that “talk” to your brain at lightning speed. When this foundation is solid, movement feels fluid and effortless; when it is neglected, the world begins to feel like a series of potential hazards.
Why Stability Declines and Why You Shouldn’t Ignore It
Stability is a “use it or lose it” faculty. Modern life—characterized by flat, predictable surfaces and prolonged sitting—effectively “mutes” our balance sensors. Without the challenge of uneven terrain, our neural pathways become sluggish. Furthermore, as we age, the sensory hair cells in our vestibular system (the inner ear) and our muscle spindle sensitivity naturally decline.
Ignoring this decline is a gamble with your future independence. A lack of stability leads to “fear of falling,” a psychological state that causes people to move less, which in turn leads to muscle atrophy and even poorer balance—a self-fulfilling prophecy of frailty.
The Promise: Reclaiming Confidence on Your Feet
The good news is that the nervous system is remarkably plastic. By engaging in targeted Balance Drills, you can wake up dormant neural connections and sharpen your physical intuition. The promise of stability training isn’t just “not falling”; it is the return of spontaneity. It is the confidence to hike a rocky trail, the agility to play with grandchildren on the grass, and the poise to move through the world with a sense of structural integrity. You aren’t just training your legs; you are training your brain to trust your body again.
The Unsung Hero of Human Movement: Understanding Balance
Balance isn’t a single skill; it’s a constant, instantaneous negotiation with gravity managed by an incredibly sophisticated internal network. We rarely give it a thought until we lose it, but it’s the foundation of all coordinated movement, from a simple pivot to an acrobatic feat.
More Than Just Your Inner Ear: The Three Systems at Play
Your body uses three primary sensory systems to continuously tell your brain where you are in space, a process known as postural control. If one system is compromised (like walking in the dark or on uneven ground), the other two compensate.
- Visual System: Your eyes provide crucial external feedback, telling you about the horizon, your surroundings, and your speed. If you close your eyes, this system is immediately taken offline, dramatically challenging your balance.
- Vestibular System: Located in your inner ear, this acts as the biological accelerometer. It detects rotational movements (head turns) and linear acceleration (changes in speed or direction), giving your brain information about gravity and motion.
- Somatosensory/Proprioceptive System: This is the feedback loop from your muscles, joints, and skin, informing your brain about the position and tension of your body parts relative to each other and the support surface.
The Proprioception Connection: Waking Up Your Body’s GPS
Proprioception is your body’s “sixth sense”—the unconscious awareness of where your limbs are without having to look at them. Think of it as your body’s internal GPS. Tiny sensory receptors called mechanoreceptors are embedded in your joint capsules, ligaments, and muscles. When you perform Balance Drills, you deliberately create instability, forcing these receptors to fire signals rapidly. This practice enhances the quality and speed of communication between your periphery and your central nervous system, effectively “waking up” your body’s internal mapping system and allowing for faster, more accurate micro-corrections.
The Core Stability Myth vs. Reality
The term “core stability” is often misinterpreted as simply having strong abdominal muscles. In reality, core stability for balance is about anti-movement—the ability of the deep trunk musculature (like the transverse abdominis and multifidus) to prevent unwanted rotation or tilting of the spine.
- The Myth: A six-pack guarantees great balance.
- The Reality: True core stability creates a rigid, stable lumbopelvic platform from which your limbs can operate. When you stand on one leg, your core stabilizes your pelvis to keep your torso level, allowing your leg muscles to focus purely on balance. Effective balance drills target this deep stabilization capacity, not just superficial strength.
The Life-Changing Benefits of Better Stability
While most people associate balance training with senior citizens or circus performers, the reality is that improving your stability cascades into every facet of your physical and psychological well-being. It is the literal foundation upon which your mobility, strength, and confidence are built.
Beyond Fall Prevention: Independence as We Age
We often view falling as an unfortunate accident, but in many cases, it is the culmination of years of sensory neglect. Prioritizing Balance Drills today is an investment in your future autonomy. As we age, the ability to recover from a trip—what clinicians call “reactive balance”—is the difference between a minor stumble and a life-altering injury. By maintaining your stability, you ensure that you can continue to perform activities of daily living, from climbing stairs to carrying groceries, without relying on external support or supervision.1 Independence is fueled by the confidence that your body can handle the unexpected.
Unlocking Athletic Potential and Power Output
In the world of sports and fitness, stability is the conduit through which force is transferred. You cannot fire a cannon from a canoe; similarly, you cannot generate maximum power from an unstable base.2 Whether you are a runner seeking a more efficient stride or a weightlifter aiming for a heavier squat, better balance ensures that energy isn’t “leaked” through unnecessary wobbles or compensations. Stability training recruits stabilizer muscles that often go dormant during machine-based workouts, leading to improved joint alignment and a significant reduction in sports-related injuries like ankle sprains and ACL tears.3+1
The Mental Edge: Reduced Anxiety in Daily Navigation
There is a profound, often overlooked connection between physical stability and mental tranquility.4 When your balance is compromised, your brain is in a state of constant, low-level “threat detection.” This can manifest as an underlying sense of anxiety when walking through crowds, crossing slick surfaces, or navigating dim lighting.
By sharpening your equilibrium, you lower the cognitive load required to simply exist in space. When you trust your feet, your nervous system can shift from a “high-alert” defensive state to a relaxed, observant state. This leads to a greater sense of presence and a reduction in the “kinesiophobia” (fear of movement) that often keeps people sedentary and stressed.
Pre-Flight Check: Preparing for Your Practice
Welcome to your pre-flight procedure! Whether you are preparing for a dedicated session of yoga, balance training, aerial conditioning, or strength work, the quality of your practice is determined long before you execute the first movement. This “Pre-Flight Check” is designed to ensure two things: physical safety and mental focus. By dedicating a few minutes to this preparation phase, you minimize distractions, maximize efficiency, and, most importantly, create a supportive environment where deep skill acquisition can take place. Consider this the essential checklist for launching a successful and sustainable fitness journey.
Creating Your Safe Stability Zone at Home
Your practice space is sacred, but it must also be safe and functional. A “Safe Stability Zone” means optimizing your physical environment to eliminate hazards and support deep focus.
1. Define Your Boundaries: Physically mark the edges of your practice space. You should be able to extend your limbs (including holding any necessary props) in all directions without contacting walls, furniture, or pets. For activities involving dynamic movements (like swings or jumps), ensure adequate overhead clearance as well.
2. Flooring and Foundation: The surface underfoot is critical.
- Stability: Choose a non-slip surface. If you are on hard floors, a high-density, non-slip mat is essential for joint cushioning and preventing slips.
- Evenness: Inspect the floor for any uneven gaps, rugs, or thresholds that could trip you or destabilize you during single-leg balances.
3. Environmental Controls:
- Lighting: Ensure the space is well-lit. Avoid harsh overhead lighting that can cause shadows that distort your perception of your own alignment.
- Temperature: Aim for a comfortable temperature that allows your muscles to warm up without overheating or getting chilled.
- Minimize Distractions: Mute your phone, turn off notifications, and inform housemates that you are unavailable. Your Safe Stability Zone should be a barrier against the outside world for the duration of your practice.
Essential Gear vs. Nice-to-Have Tools
Preparation involves more than just clearing space; it means gathering the right equipment. Separate your gear into two tiers: the non-negotiables required for safety and effectiveness, and the accessories that enhance comfort and progress.
| Essential Gear (Must-Haves) | Nice-to-Have Tools (Enhancers) |
|---|---|
| Non-Slip Mat: Provides cushioning and grip. | Foam Roller/Lacrosse Ball: For pre- and post-practice myofascial release. |
| Water Bottle: Hydration is foundational to performance. | Resistance Bands: Add progressive overload without weights. |
| Practice Towel: To manage sweat and maintain grip. | Blocks/Straps: Aids in improving mobility and range of motion. |
| Appropriate Clothing: Non-restrictive, moisture-wicking attire. | Timer/Interval App: Manages timed sets and rest periods efficiently. |
| Supportive Footwear (if applicable): Specific shoes for lifting or cross-training. | Mirror: For immediate visual feedback on form and alignment. |
Pro Tip on Gear: Place all essential gear within arm’s reach of your practice area before you start. Searching for a towel mid-session is a guaranteed disruption of focus.
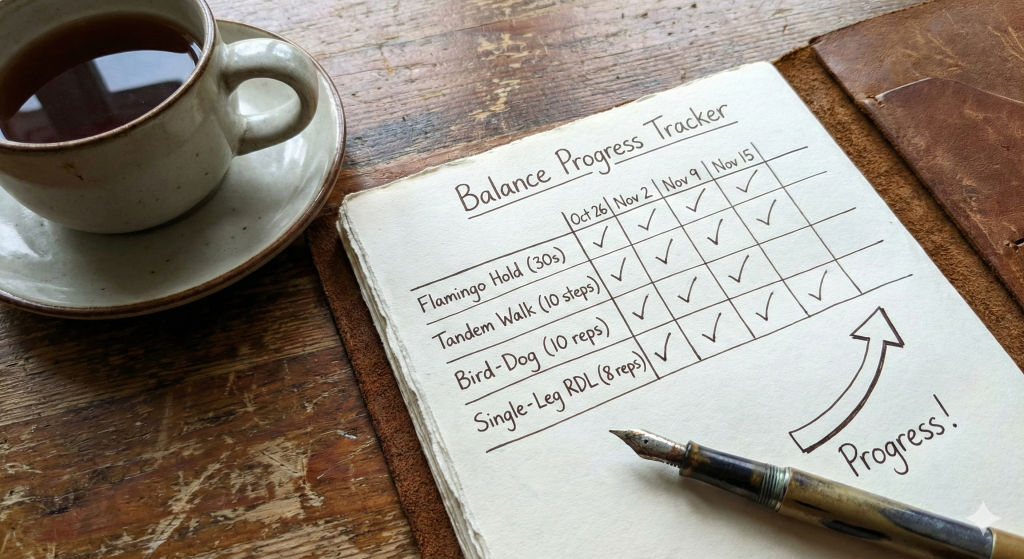
The Baseline Test: Assessing Your Current Wobble Factor
Before diving into your complex routine, performing a simple baseline test allows you to objectively measure your starting point, identify immediate physical limitations, and track progress over time. We call this the “Wobble Factor” assessment.
Purpose: To gauge your current stability, proprioception (body awareness), and unilateral strength imbalance.
The Test Protocol (The 30-Second Single-Leg Balance):
- Preparation: Stand barefoot on a hard, flat surface (your mat is fine).
- The Stance: Lift one foot off the ground. Bend the knee slightly, but keep the core engaged and the spine neutral.
- The Hold: Start a timer for 30 seconds.
- Level 1 (Basic): Eyes open, hands on hips.
- Level 2 (Advanced): Eyes closed, hands on hips.
- Scoring Your Wobble Factor:
- Score 0 (Expert): Hold the full 30 seconds without any foot movement or significant upper body sway.
- Score 1 (Stable): Hold the 30 seconds, but minor, quick adjustments (small foot wiggles) were required.
- Score 2 (Wobbly): You needed to put your foot down 1-2 times, or your upper body swayed significantly to maintain balance.
- Score 3 (Unstable): You had to put your foot down more than 3 times, or the hold lasted less than 10 seconds.
- Record: Note your score for the Left Leg and the Right Leg, as well as the level (Eyes Open/Closed).
Interpretation: If your score is a 2 or 3, or if there is a difference of more than 1 between your left and right sides, prioritize stability work and use lower-level variations of exercises until your “Wobble Factor” decreases. This test provides honest feedback, ensuring you train smart and safely.
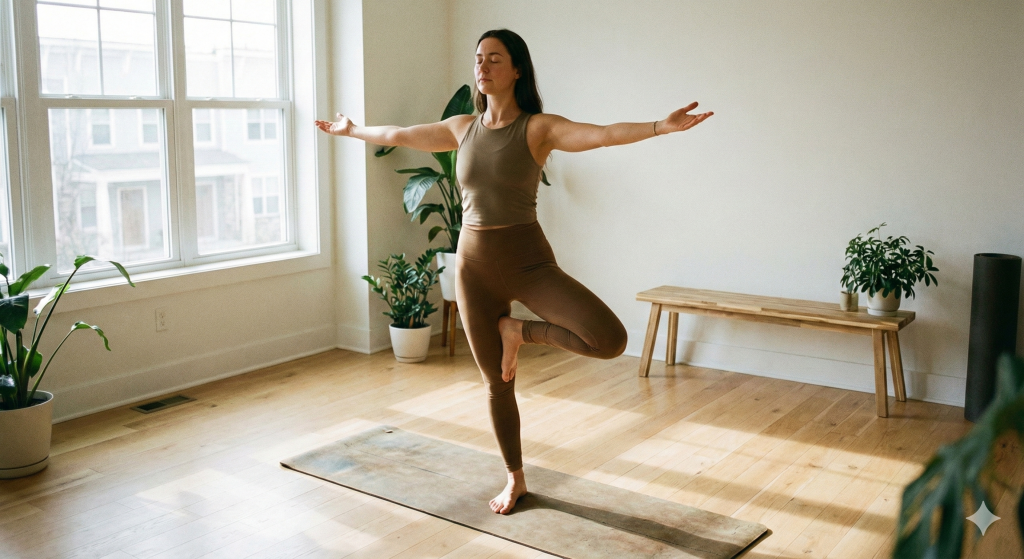
The Rock-Solid Flamingo (Single-Leg Stance Variations)
Mastering the Static Hold Without Support
Begin by standing on one leg, keeping your core engaged and your gaze forward. Hold this position for 20–30 seconds, focusing on maintaining balance without holding onto any support. This foundational move builds stability and strengthens the muscles around your ankle, knee, and hip. Gradually increase your hold time as your balance improves.
Leveling Up: Adding Head Turns and Eye Movement
Once comfortable with the static hold, challenge your balance by slowly turning your head from side to side or moving your eyes up and down. These movements disrupt your visual input, forcing your body to rely more on proprioception—the internal sense of balance. Start with small motions and increase the range as your confidence grows.
The “Eyes Closed” Challenge: Trusting Your Body Sensors
Take your balance drill to the next level by closing your eyes during the single-leg stance. Without visual cues, your body must depend entirely on your inner ear and muscle feedback to stay upright. This variation enhances body awareness and trains your balance sensors, making you more stable in real-world situations.
Move 2: Walking the Invisible Tightrope (Dynamic Tandem Gait)
While standing on one leg tests your static balance, walking the “invisible tightrope”—clinically known as a Tandem Gait—tests your dynamic stability. This move forces you to maintain your center of gravity over a constantly moving, extremely narrow base of support. It is excellent for improving proprioception (your body’s ability to sense its position in space) and coordination.
The Heel-to-Toe Basics for Linear Stability
To begin, visualize a straight line on the floor (or use a piece of painter’s tape or a line in the hardwood).
- The Setup: Stand tall with your shoulders back and your chin parallel to the floor. Extend your arms out to the sides like a T-shape to act as your counterweights.
- The Step: Place your right foot directly in front of your left, so the right heel touches the left toes.
- The Transfer: Shift your weight smoothly onto the front foot. Then, bring the back foot forward and place it directly in front of the standing foot, heel-to-toe.
- The Gaze: Keep your eyes fixed on a point at eye level ahead of you. Avoiding the urge to look down at your feet is crucial for training your inner ear (vestibular system).
Safety Tip: Perform this exercise alongside a wall or kitchen counter so you can lightly touch it if you lose your balance.
The Backward Tightrope: Reversing the Challenge
Once you have mastered the forward walk, it is time to remove your visual confirmation of where you are stepping. Walking backward requires you to trust your body’s internal mapping system.
- The Adjustment: Instead of heel-to-toe, you will now step toe-to-heel.
- The Motion: Reach your leg backward, feeling for the floor. Place your toes directly against the heel of your planted foot.
- The Focus: This variation engages the glutes and hamstrings differently and forces you to stabilize the ankle before fully transferring your weight backward.
Adding Cognitive Tasks While Walking the Line
In the real world, we rarely balance in total silence with 100% focus on our feet. We are usually carrying groceries, talking to a friend, or looking at traffic. To “bulletproof” your balance, you must train your brain to multitask.
Try these “dual-task” challenges while performing the tightrope walk:
- Verbal Fluency: Name as many animals (or fruits, or cities) as you can with every step you take.
- Math Challenge: Count backward from 100 by 7s (100, 93, 86…) as you walk.
- Memory Test: Recite your grocery list or the alphabet backward.
If you find yourself wobbling significantly when you start thinking, that is a sign that your automatic balance reflexes need more repetition.
Move 3: The Core Stabilizer (Bird-Dog Extensions)
Balance isn’t just about foot strength; it is rooted in a stable core. The “Bird-Dog” is a fundamental exercise that teaches your body to stabilize the spine while your extremities are moving. Unlike crunches, which focus on flexion, this move focuses on “anti-rotation”—teaching your core to resist twisting forces, which is essential for preventing falls when you trip.
Finding Neutral Spine on All Fours
The foundation of this movement is the “quadruped” position (hands and knees). If your setup is poor, the muscle engagement will be lost.
- The Base: Kneel on your mat with your hands directly under your shoulders and your knees directly under your hips.
- The Spine: Imagine a rod running from the top of your head to your tailbone. You want this rod to be perfectly straight.
- The Adjustment: Avoid letting your lower back sag toward the floor (swayback) or rounding your upper back up toward the ceiling (hunchback). Find the middle ground—this is your “neutral spine.”
- The Engagement: Gently pull your belly button toward your spine to activate your deep abdominal muscles (the transverse abdominis) without holding your breath.
The Opposite Limb Reach: Coordinating Diagonal Tension
This phase connects your left shoulder to your right hip, creating a diagonal line of tension across your back that reinforces stability.
- The Reach: Slowly extend your right arm forward and your left leg backward simultaneously.
- The Length: Focus on reaching for the walls in front of and behind you, rather than lifting up toward the ceiling. Lifting too high often causes the back to arch, which breaks your core stability.
- The Hold: Pause for 2–3 seconds at the top of the extension. Your extended arm should be near ear-level with the thumb pointing up, and your extended leg should be straight with the toes pointing down.
- The Return: Slowly return the hand and knee to the floor and switch to the opposite pair (left arm, right leg).
Resisting Rotation: The “Don’t Spill the Water” Cue
The most common mistake in this exercise is shifting your weight or rotating your hips to compensate for the lifted limbs. To ensure you are truly training balance:
The Visualization: Imagine a tray of water (or your favorite hot beverage) resting on your lower back.
As you lift your arm and leg:
- Keep the Hips Square: If you lift your left leg, do not let your left hip twist upward. Both hip bones should point down toward the mat like headlights.
- Minimize the Shift: Try to keep your weight centered. If you feel yourself leaning heavily onto the supporting knee, re-engage your core.
- The Goal: If that tray were real, the water should remain perfectly still throughout the entire movement. If your hips rock, the water spills.
Move 4: The Functional Hinge (Single-Leg Romanian Deadlift)
The Single-Leg Romanian Deadlift (RDL) is the crown jewel of functional balance. It mimics the real-world action of bending down to pick something up while balancing on one foot. This move strengthens the “posterior chain” (glutes and hamstrings) while forcing the small stabilizer muscles in your foot and ankle to work overtime.
Hinging at the Hips, Not Rounding the Back
The most critical aspect of this movement is understanding the difference between a “squat” and a “hinge.” In a hinge, your knees bend only slightly, and the movement comes entirely from your hips pushing backward.
- The Cue: Imagine you are trying to close a car door behind you with your glutes.
- The Spine: Keep your chest proud and your back perfectly flat. As you lower your torso, your spine should remain rigid, like a plank.
- The Mistake: If you feel your spine curling forward (like a fishing rod bending), stop. You have gone too low. Range of motion is less important than a neutral spine.
The Non-Working Leg: Using It as a Counterbalance
Think of your body as a teeter-totter (seesaw). The leg you are standing on is the fulcrum (pivot point).
- The Connection: Your torso and your lifted leg are one solid unit. As your chest lowers toward the floor, your back leg must rise at the exact same speed.
- The Line: At the bottom of the movement, there should be a straight line running from the top of your head to the heel of your lifted foot.
- The Engagement: Flex the foot of the lifted leg (pull toes toward the shin) and drive that heel toward the back wall. This engages the glute and helps keep your hips square to the floor.
Integrating Light Weights to Challenge Your Center of Gravity
Once you can perform 10 repetitions with perfect stability using just your body weight, you can introduce external load. This shifts the center of gravity and increases the demand on your core.
- Contralateral Loading (Recommended): Hold a weight (dumbbell or kettlebell) in the hand opposite to the standing leg (e.g., stand on left leg, hold weight in right hand). This tries to twist your body, forcing your core to fight that rotation (anti-rotation).
- Ipsilateral Loading: Hold the weight in the same hand as the standing leg. This creates a different stability challenge and often requires more focus to keep the hip from dropping.
- The Path: Ensure the weight travels straight down toward the inside arch of your standing foot, keeping it close to your body to protect your lower back.
Move 5: The 360-Degree Star Reach (Excursion Drills)
Real life is rarely linear; we twist, turn, and reach sideways constantly. This “Star Reach” drill pushes your “limits of stability”—how far you can lean away from your center without falling. It forces your ankle, knee, and hip to work together to pull you back to center from awkward angles.
Setting Your Center Point on the Floor
Before moving, you need to establish a stable anchor.
- The Grid: Imagine you are standing directly in the center of a large clock face painted on the floor.
- The Anchor: Plant your left foot in the dead center of the clock. This foot must remain glued to the floor—heel down, toes spread.
- The Hover: Lift your right foot slightly off the ground. This is your “reaching” limb. Hands can be on your hips or held in a “prayer” position at your chest to prevent using your arms for momentum.
Reaching for the “Hours” on the Clock Face
The goal is to reach your hovering foot as far as possible toward specific “hours” on the clock, tap the floor lightly with your toe, and return to the start position without putting weight on the reaching foot.
- 12 o’clock (Anterior): Reach directly forward.
- 3 o’clock (Lateral): Reach directly out to the side.
- 6 o’clock (Posterior): Reach directly behind you.
- The Cross-Over (8 o’clock): This is the hardest variation. Reach your right foot behind your standing left leg toward the back-left corner. This forces a deep rotational stabilization in the left hip.
Switch legs and repeat the pattern (reaching for 12, 9, 6, and 4 o’clock).
Depth vs. Reach: Controlling the Stance Knee
You quickly realize that you cannot reach very far if your standing leg stays straight. To maximize your reach, you must perform a single-leg squat.
- The Mechanics: As you reach, bend your standing knee and sit your hips back. The lower you go, the further you can reach.
- Knee Tracking: This is critical for safety. Watch your standing knee. It should point in the same direction as your toes (usually forward or slightly out).
- Avoid the “Cave-In”: Do not let your knee collapse inward (valgus collapse) toward your big toe. This puts stress on the ACL. Push the knee slightly outward to engage your glutes.
- The Light Tap: Imagine the floor is made of thin glass. You want to tap the “hour” gently enough not to break it. If you stumble or rest your weight on the reaching foot, the rep doesn’t count.
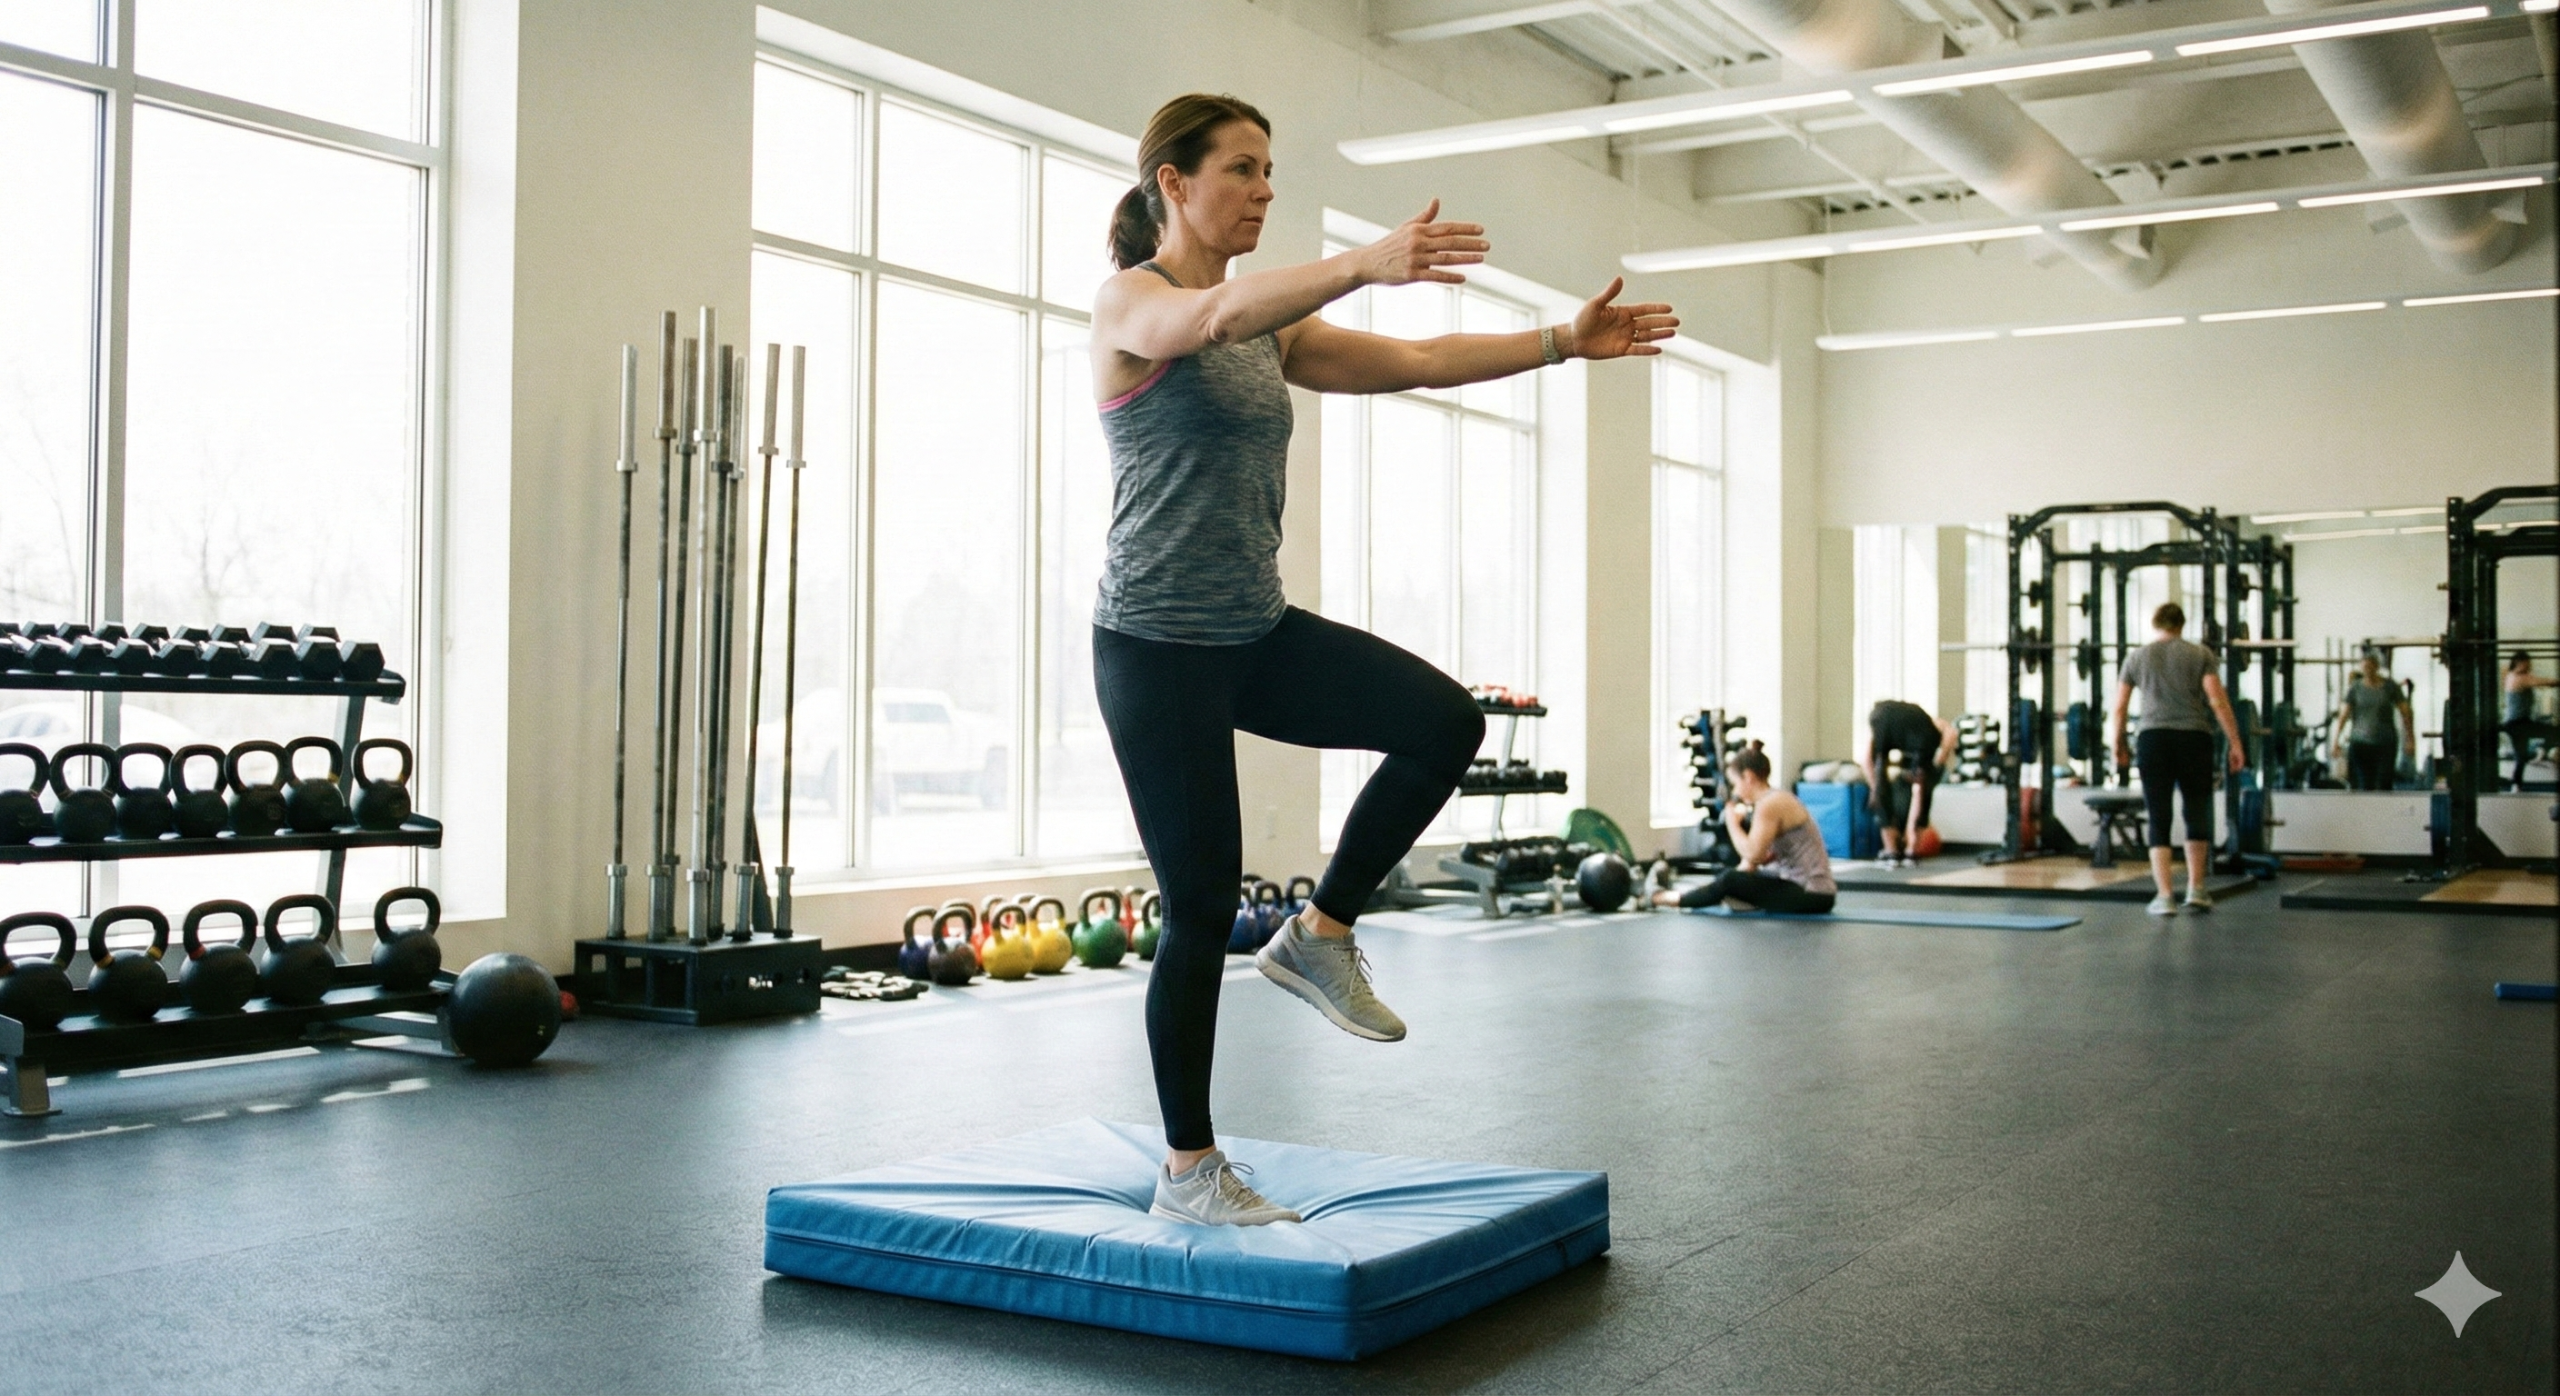
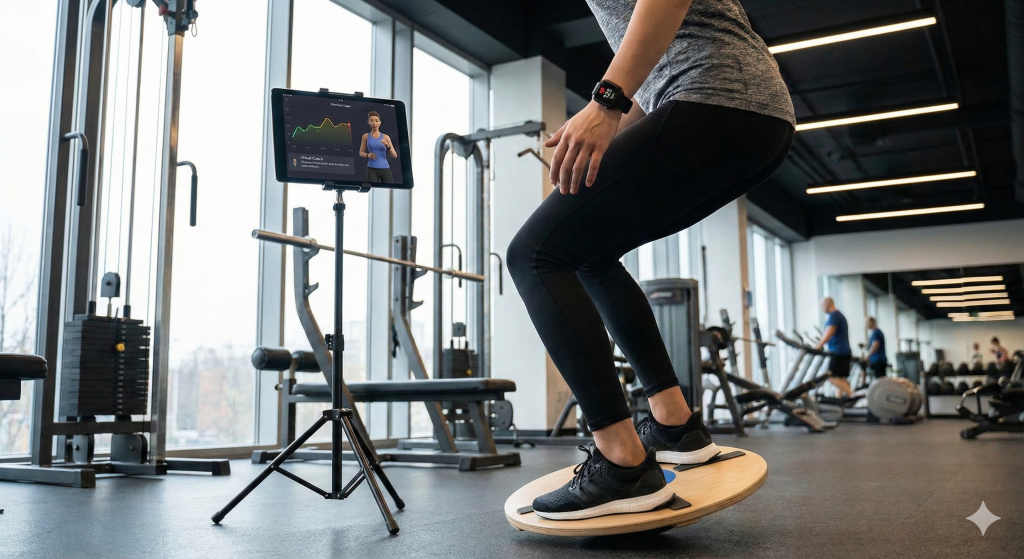
Move 6: The Controlled Chaos (Unstable Surface Squats)
Once you have mastered stability on solid ground, the final frontier is maintaining that control when the ground itself feels unpredictable. Training on unstable surfaces—like foam or air-filled domes—overloads your proprioceptive system. It forces the tiny stabilizer muscles in your ankles and feet to fire rapidly to prevent you from toppling, mimicking the sensation of walking on sand, uneven hiking trails, or icy sidewalks.
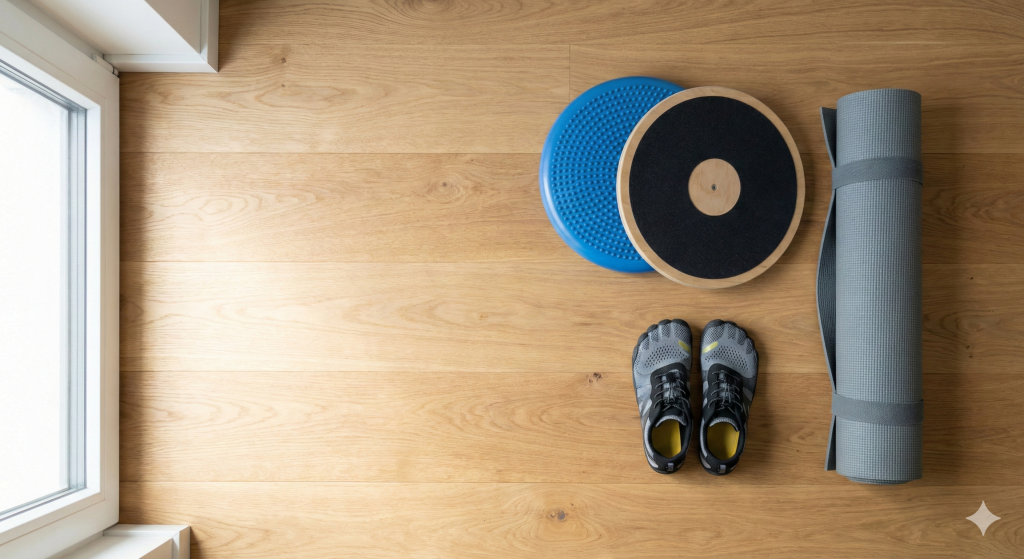
Introduction to Foam Pads and Bosu Balls
To perform this move, you need a disruptor.
- The Foam Balance Pad: This is the entry-level tool. It is a dense, rectangular piece of foam about 2–3 inches thick. It creates a “squishy” surface that destabilizes your foot slightly, requiring more ankle engagement than a hard floor.
- The Bosu Ball: This looks like a stability ball cut in half. Standing on the inflated dome side provides a high level of instability. It moves in 360 degrees, responding to every shift in your weight.
Note: If you do not have equipment, you can mimic the foam pad effect by folding a thick towel or blanket several times to create a cushioned, shifting surface.
Finding Your Footing Before You Squat
Getting onto an unstable surface is often harder than the exercise itself.
- Safety First: Place your equipment within arm’s reach of a wall, railing, or sturdy chair.
- ** The Mount:** Step one foot strictly into the center of the pad or the bullseye of the Bosu dome.
- The Second Step: Quickly but controlled, bring the other foot up, placing it evenly so your feet are shoulder-width apart.
- The Stabilization: Do not squat yet. Stand tall. You will likely feel your ankles shaking or twitching. This is your nervous system calibrating. Wait until the shaking subsides slightly and you feel centered.
The Slow Descent: Fighting the Wiggles on the Way Down
The goal here isn’t how low you can go, but how smoothly you can move.
- The Tempo: Take a full 4 seconds to lower yourself. Gravity is trying to pull you down quickly; your job is to resist it.
- The “Wiggles”: As you descend, your knees and ankles will wobble. Fight to keep your knees pressing outward, tracking over your toes. Do not let the instability cause your knees to knock together.
- The Depth: Only go as deep as you can while maintaining a flat back and relative stability. A quarter-squat with perfect control is better than a deep squat where you fall off.
- The Drive: Press evenly through the entire foot (not just the heels or toes) to return to standing.
Here is the drafted content for “Move 7” and the final wrap-up section, structured around your headers.
Move 7: The Mindful Mover (Slow-Motion Marching with Pauses)
We often rush through life, and paradoxically, speed can sometimes mask a lack of balance. Momentum can keep you upright even when your control is poor. By slowing everything down to a crawl, you remove momentum from the equation. This move, “The Mindful Mover,” forces you to own every millimeter of the movement pattern, exposing and correcting weak spots in your gait.
The High-Knee Pause: Freezing in Mid-Air
The core of this exercise is the pause. It turns a simple walk into a serious stability challenge.
- The Lift: Stand tall and slowly lift your right knee until your thigh is parallel to the floor (hip height).
- The Freeze: Hold this position like a statue for 3 full seconds. Do not just hang out there; actively push your standing foot into the floor and pull the crown of your head toward the ceiling.
- The Check-In: Notice if your standing hip is jutting out to the side. Squeeze your glute to pull that hip back into alignment under your shoulder.
- The Switch: Slowly lower the right foot and immediately transition into lifting the left knee.
Incorporating Opposite Arm Swings
Walking is a contralateral movement—our arms and legs move in opposition. Reconnecting this pattern improves overall coordination.
- The Setup: As you lift your right knee, drive your left arm forward (bent at 90 degrees, like a sprinter). Your right arm drives back.
- The Sync: The pause applies to your arms, too. When the knee freezes at the top, your arms must freeze instantly.
- The Challenge: This coordination often confuses the brain when done slowly. If you find yourself lifting the same-side arm and leg (tick-tock walking), reset and start again.
The Slow-Motion Running Man: Dynamic Fluidity
Once you have the pause down, try to make the transition between steps seamless, like you are moving through water or watching a slow-motion replay of a sprint.
- Continuous Tension: Instead of a hard “stop-and-go,” aim for a fluid, continuous motion where the “freeze” is just a moment of peak tension.
- The Roll-Through: When you place your foot down, deliberately roll from the ball of the foot to the heel, absorbing the impact silently.
- The Visual: Imagine you are a mime performing a running motion in place. It requires intense focus and core engagement to look effortless.
Cool Down & Integration
Balance training is neurological training. You don’t need to be sweaty to be tired; your brain has been working hard!
- Calf Stretch: Step one foot back and press the heel into the floor to release the calves, which often work overtime during balance work.
- Ankle Circles: Rotate your ankles 10 times in each direction to loosen the joint capsule.1
- The Integration Walk: Finish by walking normally around the room. Notice if you feel lighter, taller, or more aware of how your feet strike the ground.
Summary of Your Balance Routine
| Move | Name | Focus | Reps/Duration |
| 1 | The Stork Stand | Static Single-Leg Balance | 30–60 sec per leg |
| 2 | The Invisible Tightrope | Dynamic Tandem Gait | 10–15 steps fwd/back |
| 3 | Bird-Dog Extensions | Core Anti-Rotation | 10–12 reps per side |
| 4 | Single-Leg RDL | Posterior Chain Hinge | 8–10 reps per leg |
| 5 | 360-Degree Star Reach | Multi-Planar Excursion | 3 rounds per leg |
| 6 | Unstable Surface Squats | Proprioception | 10–12 slow reps |
| 7 | Slow-Motion Marching | Gait Control & Coordination | 20 total marches |
Designing Your Weekly Stability Routine
Knowing how to balance is one thing; knowing when to practice is another. Balance is a “use it or lose it” skill. Unlike building muscle, which requires rest days for recovery, your proprioceptive system (your body’s internal GPS) thrives on frequent, low-intensity stimulation.
Frequency Matters: A Little Bit Every Day vs. Once a Week
If you had to choose between one grueling 60-minute balance session on Sunday or ten minutes of practice every morning, choose the latter.
- The Neurological Rule: Balance is largely a function of the nervous system. Nerves learn best through frequent repetition, not exhaustion.
- The “Toothbrush” Approach: Treat balance training like brushing your teeth. It doesn’t need to be an “event.” It should just be a non-negotiable part of your daily hygiene.
- Micro-Dosing: You don’t even need gym clothes. Stand on one leg while waiting for the coffee to brew. Walk heel-to-toe down the hallway to the bathroom. These “micro-doses” of training add up significantly over a week.
Integration Strategy: Adding Drills to Warm-ups or Cool-downs
If you already have a fitness routine (running, lifting, yoga), you don’t need to carve out a separate “balance hour.” Piggyback these moves onto your existing habits.
- The Primer (Warm-Up): Use Move 3 (Bird-Dog) and Move 7 (Slow Marching) as part of your warm-up. They wake up the core and glutes, priming your body for heavier movement.
- The Finisher (Cool-Down): Use Move 1 (Stork Stand) or Move 2 (Tightrope) at the end of a workout when your legs are slightly tired. Training balance under mild fatigue simulates real-life scenarios (like hiking back down a mountain when you are exhausted).
- The Active Rest: Between sets of bench press or squats, instead of sitting on your phone, perform a set of Move 4 (Single-Leg RDL) with bodyweight.
From Wobbly to Warrior: Signs You Are Ready to Progress
How do you know when a move is too easy? If you can perform the prescribed reps while daydreaming about dinner, it’s time to level up.
Look for these three signs of mastery:
- Visual Independence: You can perform the move with your eyes closed (or while looking around the room) without losing stability.
- Cognitive Freedom: You can hold a conversation or do mental math while performing the movement.
- Speed Control: You can deliberately speed up or slow down the movement without your form breaking down.
The Progression Ladder:
- Level 1: Hold onto a wall.
- Level 2: Hands hovering near the wall (safety net).
- Level 3: Hands on hips (no arm counterbalance).
- Level 4: Eyes closed or standing on a foam pad.
The Long Game: Maintaining Balance Through the Decades
Improving your balance isn’t a 6-week program; it is a lifelong commitment to remaining vertical in a world that wants to pull you down. As we age, the systems that control our stability (vision, inner ear, and proprioception) naturally degrade.1 The only way to slow that decline is to constantly challenge it.
Why Consistency Beats Intensity
In the world of fitness, we often praise the “no pain, no gain” mentality. However, for balance, “frequency beats intensity” every time.
- The Neurological Groove: Balance is a skill, similar to learning a language or playing the piano. You are training your nervous system, not just your muscles. Practicing for 5 minutes every day is far superior to a single 60-minute session once a week.
- The “Use It or Lose It” Reality: Your brain is efficient.2 If you stop challenging your balance, your brain stops allocating resources to those neural pathways. Consistency keeps those pathways open and fast.
- The Daily Habit: Frame balance as hygiene, not exercise. You wouldn’t skip brushing your teeth for a week and then brush for an hour on Sunday. Treat your stability drills the same way.
Lifestyle Factors That Sabotage Your Stability
You can do all the single-leg squats in the world, but certain lifestyle choices can quietly undermine your progress.
- The Sedentary Trap: Sitting for long periods tightens the hip flexors and weakens the glutes.3 This alters your posture, pitching your center of gravity forward and making you more prone to stumbling.
- Footwear Choices: Thick, overly cushioned shoes act like sensory deprivation chambers for your feet.4 They dampen the signals your soles send to your brain about the terrain. Spending time barefoot or in minimalist shoes around the house can reawaken those sensors.5+1
- Dehydration and Medication: Sometimes a fall isn’t mechanical; it’s physiological. Dehydration can cause drops in blood pressure upon standing (orthostatic hypotension), leading to dizziness.6 Similarly, be aware of how new medications affect your equilibrium.
Knowing When to Consult a Physical Therapist
While at-home exercises are powerful, they are not a cure-all. There are times when professional intervention is necessary to ensure safety.
Seek a Physical Therapist if:
- You Have Experienced a Fall: If you have fallen in the last 6 months, even if you weren’t injured, it is a red flag that needs assessment.
- Persistent Dizziness: If the room spins when you roll over in bed or look up (vertigo), this is often an inner ear issue (vestibular dysfunction) that requires specific maneuvers, not just squats.
- Fear of Falling: If you find yourself avoiding activities you used to love (like walking the dog or gardening) because you are afraid of falling, a PT can help you regain confidence safely.
Frequently Asked Questions About Improving Balance
How often should I practice these drills to see results?
Frequency is far more important than duration.1 Because balance is a neurological skill, your brain needs frequent repetition to reinforce the pathways.2 Aim for 5–10 minutes every single day rather than one long session a week. Think of it like dental hygiene: daily maintenance prevents decay.+1
Can I do these exercises if I already feel very unsteady?
Absolutely, but safety is your priority. Start at “Level 1” for every exercise: keep a sturdy chair or a wall within arm’s reach, or even keep your fingertips lightly touching a surface. You do not need to let go completely to benefit; the micro-corrections your body makes while lightly supported still train your stability.
Are my shoes affecting my balance?
Likely, yes. Modern running shoes often have thick, cushioned soles that act as “sensory deprivation chambers” for your feet. They dampen the signals your soles send to your brain about the ground.3 Whenever safe (and indoors), try performing these drills barefoot or in socks to wake up the thousands of nerve endings in your feet.
What is the best time of day to train for stability?
The best time is when your mind is fresh. For most people, this is in the morning. Balance requires intense focus; if you try to do it late at night when you are mentally exhausted, your form will suffer, and your risk of falling increases. Alternatively, use these drills as a warm-up before a workout.
Is it normal to feel dizzy during some of these movements?
A slight feeling of “wobbliness” or disorientation is normal—that is your system learning to calibrate. However, if you feel the room spinning (vertigo), become nauseous, or feel like you are going to faint, stop immediately. This could indicate an inner ear issue or blood pressure problem that requires medical attention.
How do I know if my balance problem is serious and needs a doctor?
You should see a doctor or physical therapist if:
- You have fallen (with or without injury) in the past 6–12 months.
- You experience vertigo (spinning sensation) when turning your head or rolling over in bed.4
- You have a sudden onset of unsteadiness accompanied by headaches or vision changes.
- You are so afraid of falling that you are avoiding daily activities.
Can strength training alone improve my balance?
It helps, but it isn’t enough. Strong legs (quads and calves) provide a solid base, but balance is about coordination—how quickly your brain detects a shift in weight and fires the right muscles to correct it. You need specific instability drills to train that reaction time.
Are there age limits to starting these drills?
No. Whether you are 9 or 90, your nervous system retains “neuroplasticity”—the ability to learn and adapt.5 Older adults may need to progress more slowly and rely more on hand support initially, but improvements in stability can be made at any age.6+1
Do I really need to close my eyes during the exercises?
Eventually, yes. Your balance relies on three systems: vision, the inner ear (vestibular), and proprioception (body sense).7 We are often “vision dominant,” relying too much on our eyes. Closing your eyes forces the other two systems to work harder, which “bulletproofs” your balance for dark environments (like waking up at night).
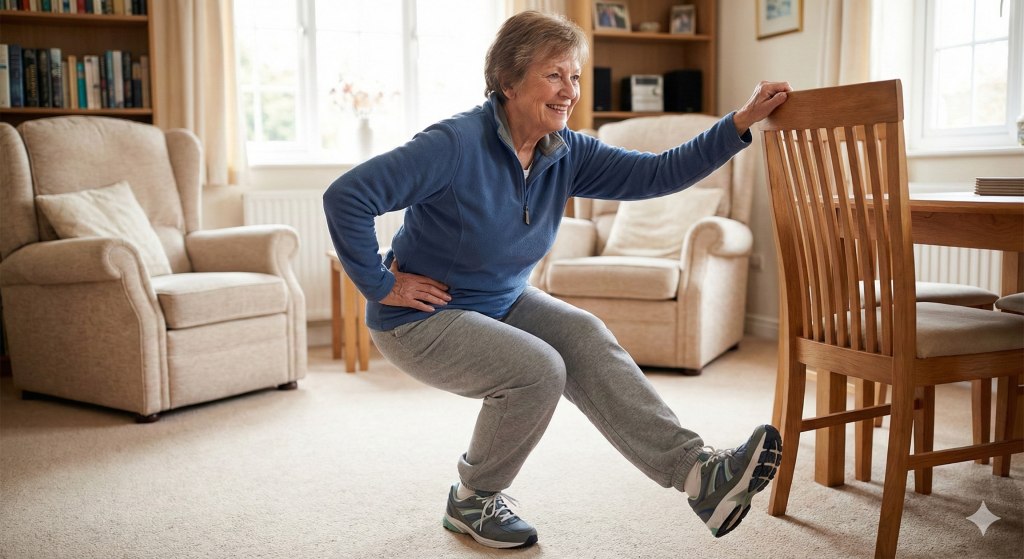
What if I can’t do a single-leg stand for even a second?
Regress the movement to a “Kickstand” stance. Stand on one leg but keep the toes of your other foot lightly touching the floor for support. Gradually try to lift those toes for split seconds at a time. Consistency in this modified position will build the strength you need to eventually lift the foot completely.
How does dehydration affect stability?
Dehydration reduces blood volume, which can lead to a drop in blood pressure when you stand up (orthostatic hypotension), causing lightheadedness. It can also affect the fluid viscosity in your inner ear, which is crucial for equilibrium.8 Staying hydrated is one of the easiest ways to protect your balance.
Can yoga or Tai Chi replace these specific drills?
They are excellent complements and often include versions of these moves (like Tree Pose in yoga). However, these specific drills are often more targeted and time-efficient for addressing specific deficits (like hip weakness or gait mechanics) that might get glossed over in a general flow class.
Why is one side of my body so much wobblier than the other?
Almost everyone has a dominant side, just like being right- or left-handed. Years of favoring one leg for standing, kicking, or stepping creates strength imbalances. Balance training is the best way to identify and correct these asymmetries before they lead to injury.
Should I feel muscle burn during balance drills?
Yes! You might be surprised at how much your calves, ankles, and glutes burn. Even though you aren’t moving heavy weights, your stabilizer muscles are firing rapidly and constantly to keep you upright. This “time under tension” is a genuine workout.
How quickly can I expect to notice improvements in daily life?
Most people feel “lighter” and more confident within 2–3 weeks of daily practice. You might notice you don’t grab the railing as tightly when going down stairs, or that putting on socks while standing becomes easier. These small wins are signs that your neurological pathways are strengthening.
Conclusion
Building better balance is not just about avoiding a fall; it is about building a body that is capable, resilient, and ready for whatever the world throws at it. You have moved through the anatomy of stability, tested your limits, and learned the seven fundamental patterns that bulletproof your foundation.
Recap: The 7 Moves to Anchor Your Foundation
You now have a complete toolkit to address every aspect of stability, from your inner ear to your big toe.
- The Stork Stand: Mastering static single-leg control.
- The Invisible Tightrope: navigating dynamic, linear movement.
- Bird-Dog Extensions: Building a core that resists rotation.
- Single-Leg RDL: Strengthening the posterior chain for real-world lifting.
- The 360-Degree Star Reach: Expanding your limits of stability in all directions.
- Unstable Surface Squats: Training your proprioception to handle chaos.
- Slow-Motion Marching: Refining gait and coordination through mindfulness.
The Ripple Effect of Stability on Your Overall Health
When you trust your body to hold you up, everything else becomes easier. The benefits of this routine extend far beyond the gym floor:
- Cognitive Freedom: When you don’t have to consciously focus on not falling, your brain has more bandwidth to enjoy the scenery, talk to friends, and react to your environment.
- Joint Longevity: By teaching your muscles to absorb impact properly (like in the slow-motion march), you save your knees and hips from unnecessary wear and tear.
- Confidence & Independence: The fear of falling is a cage that shrinks your world. Improving your balance is the key to unlocking that cage, giving you the confidence to hike that trail, climb that ladder, or simply walk across an icy parking lot without panic.
Your Call to Action: Take the First Wobbly Step Today
It is easy to read about balance; it is harder to practice it. You might feel silly standing on one leg in your kitchen. You might feel frustrated when you wobble. You might feel discouraged if you have to hold onto the wall.
Embrace the wobble.
That shaking in your ankle isn’t weakness; it is your nervous system learning. It is the sound of your brain building new connections. Every second you spend fighting to stay upright is a deposit in your long-term health savings account.
Do not wait for the “perfect” time. Kick off your shoes right now, find a patch of floor, and stand on one leg. Your journey to a more stable, grounded life starts with that single, wobbly step.